Apple Pay for web
You can enable Apple Pay via the Airwallex web app. Airwallex handles the registration with Apple in the backend for you and also manages validation and payment processing functions of Apple Pay on behalf of you. You will not be required to create an Apple Merchant ID, generate and maintain certificates and integrate with Apple directly.
Airwallex uses its own certificates to handle validation and decryption of payment tokens. This is not supported for mobile integrations therefore you are required to have your own Merchant ID and certificates for mobile integration.
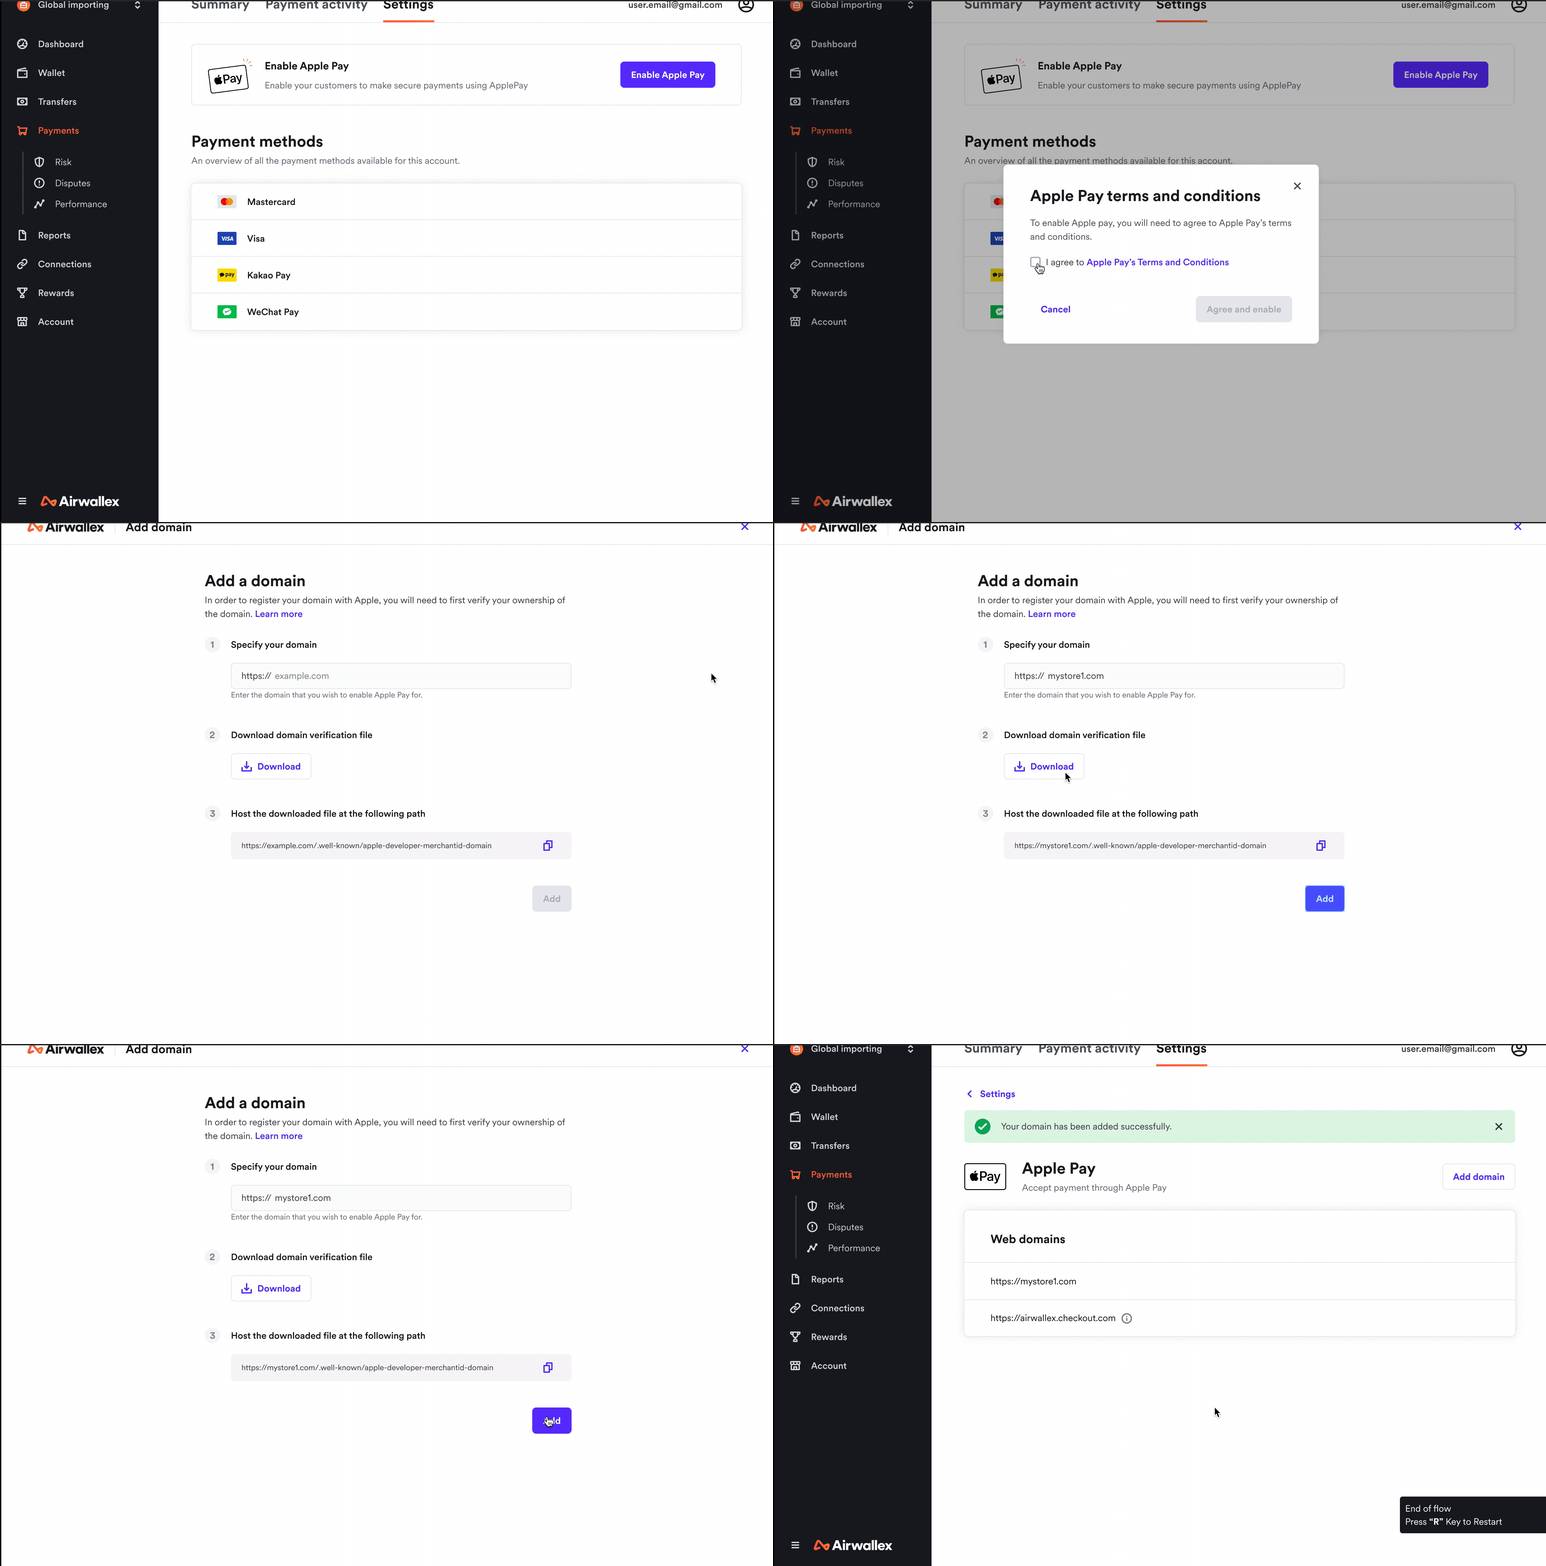
You can enable Apple Pay as a payment method for your merchant account using these three simple steps.
-
Enable Apple Pay: You can find this option under Payments > Settings once you log in to your account on the Airwallex web app. As a prerequisite, your merchant account must be set up for online payments to add Apple Pay as a payment method.
-
Accept Apple Pay terms & conditions: Apple has defined a set of guidelines that you are expected to abide by if you would like to offer Apple Pay as a payment method. These terms need to be agreed to before proceeding with the registration steps.
-
Add your domain: Note: This step can be skipped if you are using Airwallex's hosted payment page, payment links or Shopify. For all other integration methods, your domain information needs to be verified by Apple before you can process ApplePay payments. See explanation from Apple to understand the merchant verification process . Follow the steps below to complete your registration:
a) Specify your domain name : Register with Apple all of your web domains that will show an Apple Pay button. Must be a valid domain name.
b) Download domain verification file : Apple provides a domain verification file which enables them to verify the associated domain during the registration process.
c) Specify path to host file : Host the file at this path
<<DOMAIN_NAME>>/.well-known/apple-developer-merchantid-domain-associationon your site. While hosting this file,content-typeshould be set toapplication/octet-stream.
