Enable Apple Pay (Express Checkout)
This guide walks through the steps required to enable Apple Pay (Express Checkout) on your Woo Store. This will allow your shoppers to checkout with just one step!
Apple Pay lets customers pay quickly and securely through your online store.
Apple Pay offers an accelerated checkout process. When a customer pays for their order using Apple Pay, they do not need to manually enter their credit card information, billing address or shipping address. The customer taps the Apple Pay button and scans their fingerprint, and Apple Pay provides that information to the Airwallex. You don't pay any extra fees for accepting Apple Pay.
Requirements
- You must enable Airwallex - Cards as a payment method on Woo. Please follow this guide if you have not enabled it
- The merchant must have SSL activated on the store domain (This would mean your url needs to start with https:)
- Your store must adhere to the Apple Pay API Terms of Service .
- Apple Pay must be activated on Airwallex as a payment method

Steps to enable Apple Pay
- Go to your payment settings via your WordPress admin panel, WooCommerce > Settings > Payments. You should be able to see the following screen

- Click on Airwallex - Express checkout to enter the settings page
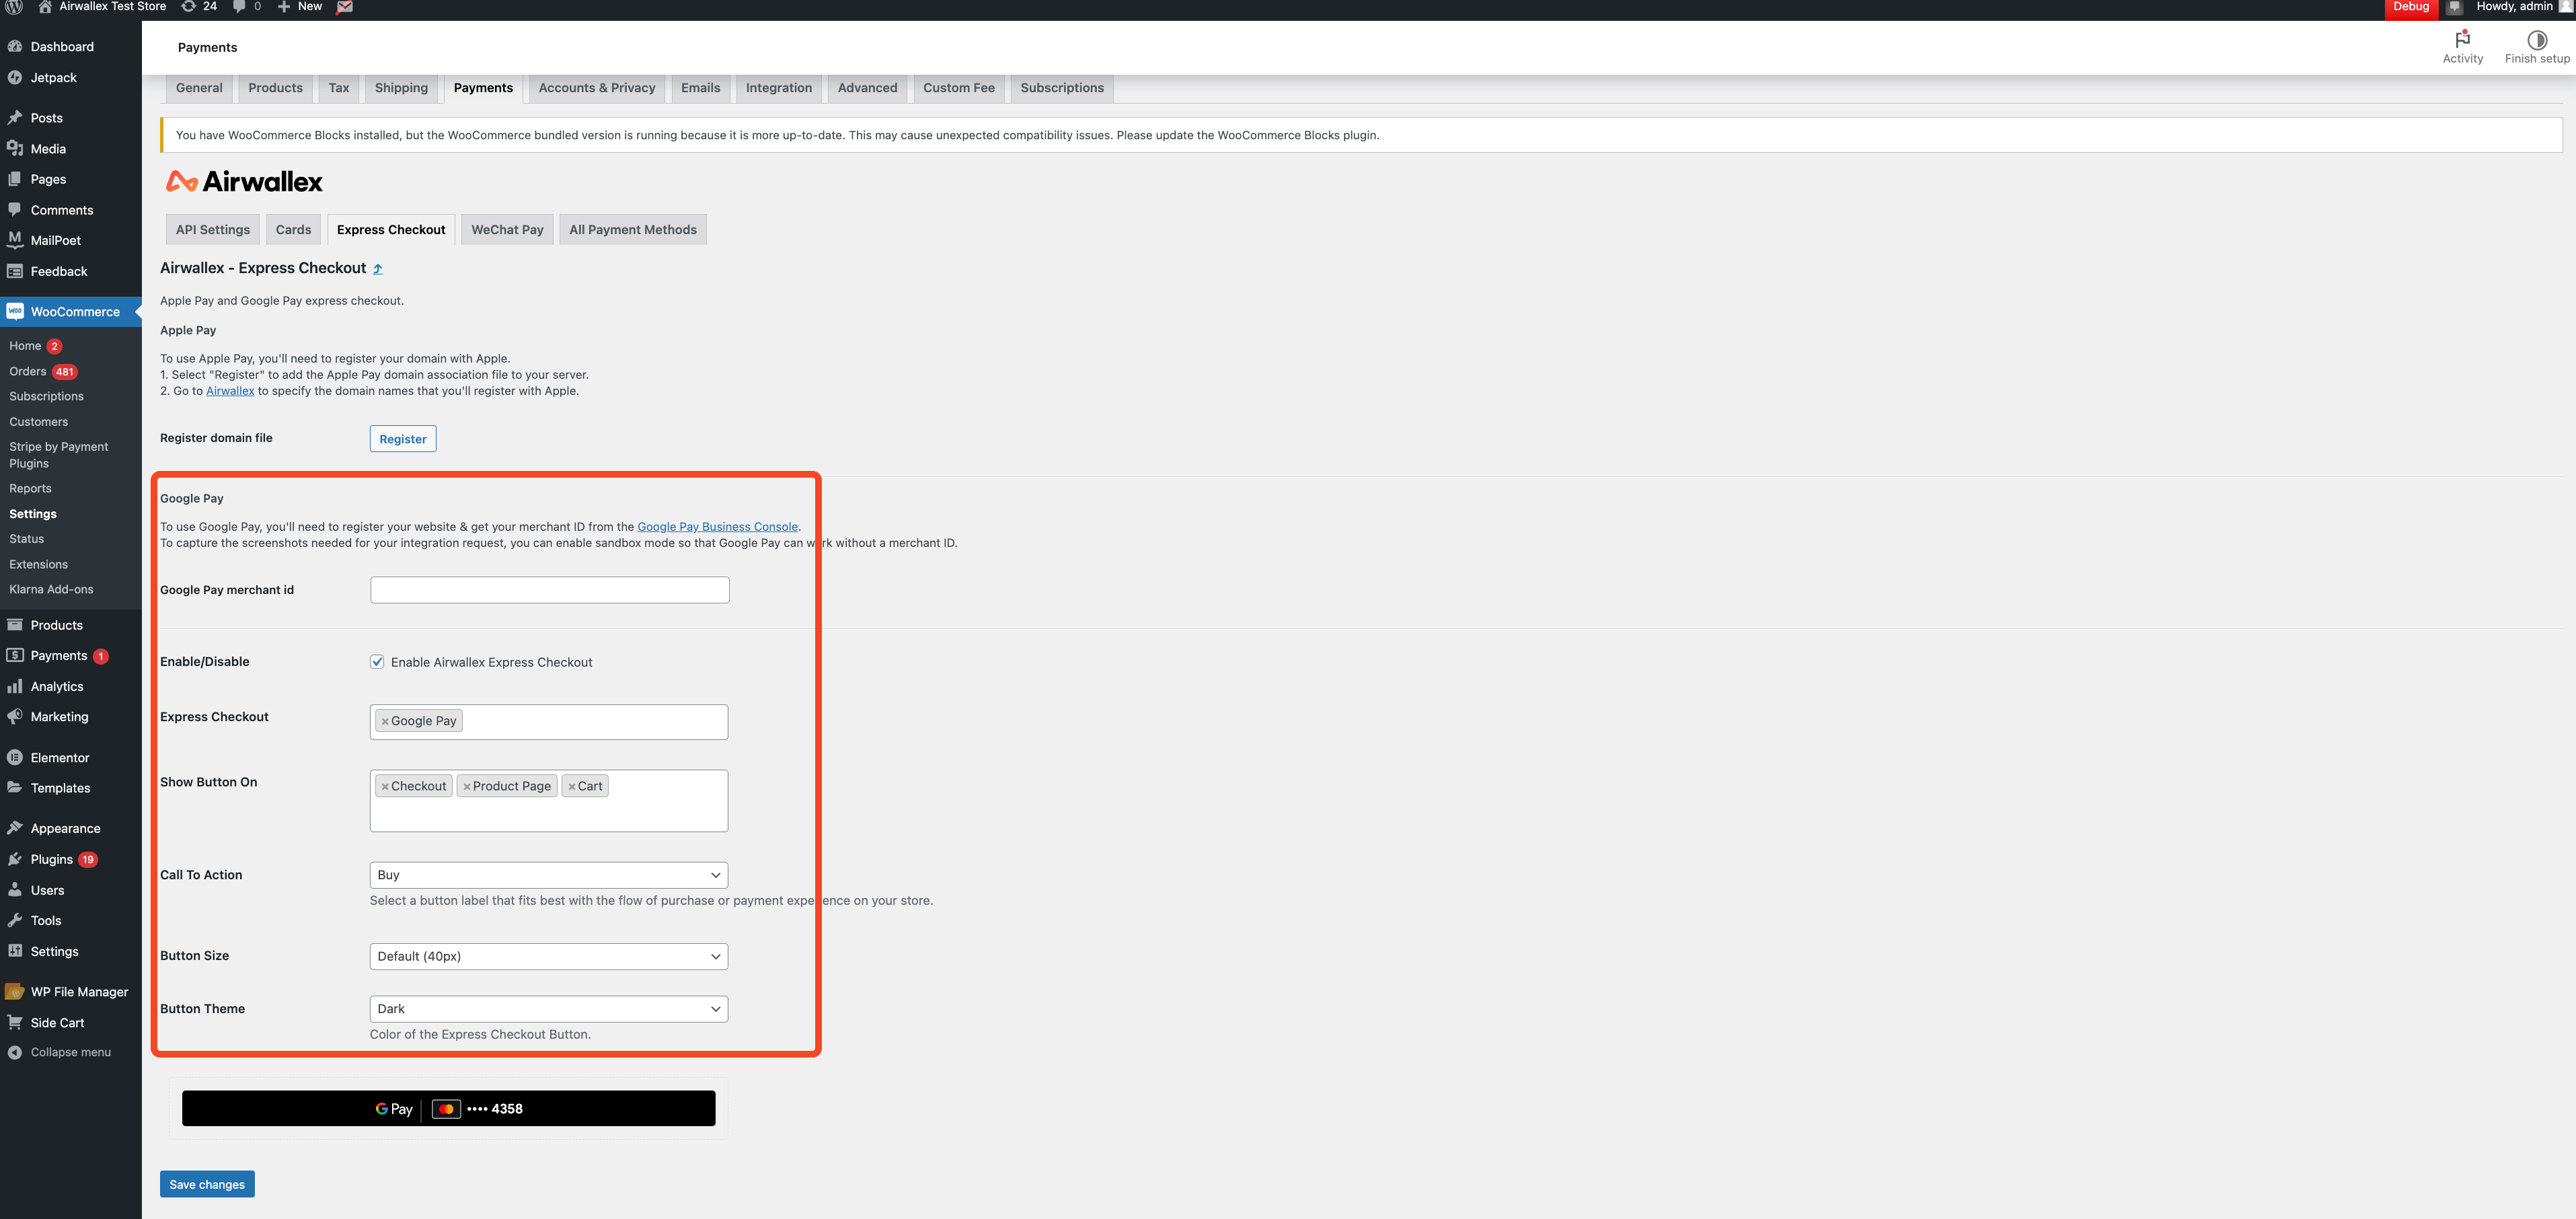
- Click Enable Airwallex Express Checkout
- Add Apple Pay under Express Checkout
- We will register your domain automatically for you. If the automated registration fails, please do it manually by following the instructions here
- Configure where you wish to display the Apple Pay buttons. You are able to choose either or all of "Product Page", "Checkout" and "Cart" These can be seen in the shopper experience section below
- Configure the other options based on the requirements of your products and webpage. You will be able to see them change in the preview below. Click Save Changes once you are done. Options available are:
- Call to action (CTA) - Defines what text is displayed on the button
- Button Size - Defines how large the button is
- Button Theme - Defines what colour theme the button will show
We recommend that you turn on express checkout at all the possible placements to maximise conversion rates
Using the same domain as the one provided during Onboarding
We will use the domain that you provided during onboarding to process Apple Pay payments. Hence it is vital that it is the same one you are using for your Woo site. If it is different, please reach out to your Account Manager or [email protected] to have it updated.
Card Scheme Configuration
Apple Pay respects the scheme selection on Airwallex settings
Activate schemes via Airwallex through Airwallex > Payments > Payment Methods For e.g. if Visa is not activated on Airwallex, customers will be able to select their Visa Cards upon checkout but it will fail at the processing stage
Hence for a merchant to accept Visa on Apple Pay, they need to select and activate it on Airwallex.
Shopper Experience
Requirements:
Devices that support Apple Pay To access the Apple Pay button, your customers must use one of the following devices:
-
iPhone (SE, 6, 6 Plus, or newer)
-
iPad (Pro, Air 2, mini 3, or newer)
-
MacBook Pro with Touch ID *
-
Any Mac model (2012 or newer) plus an Apple Pay-activated iPhone or Apple Watch *
-
*Shoppers have to be browsing on Safari to use Apple Pay on MacBooks
Customer experience: Note: This are examples and may not be representative of the real shopper experience on your site
- Product Details Page

- Cart Page

- Checkout Page
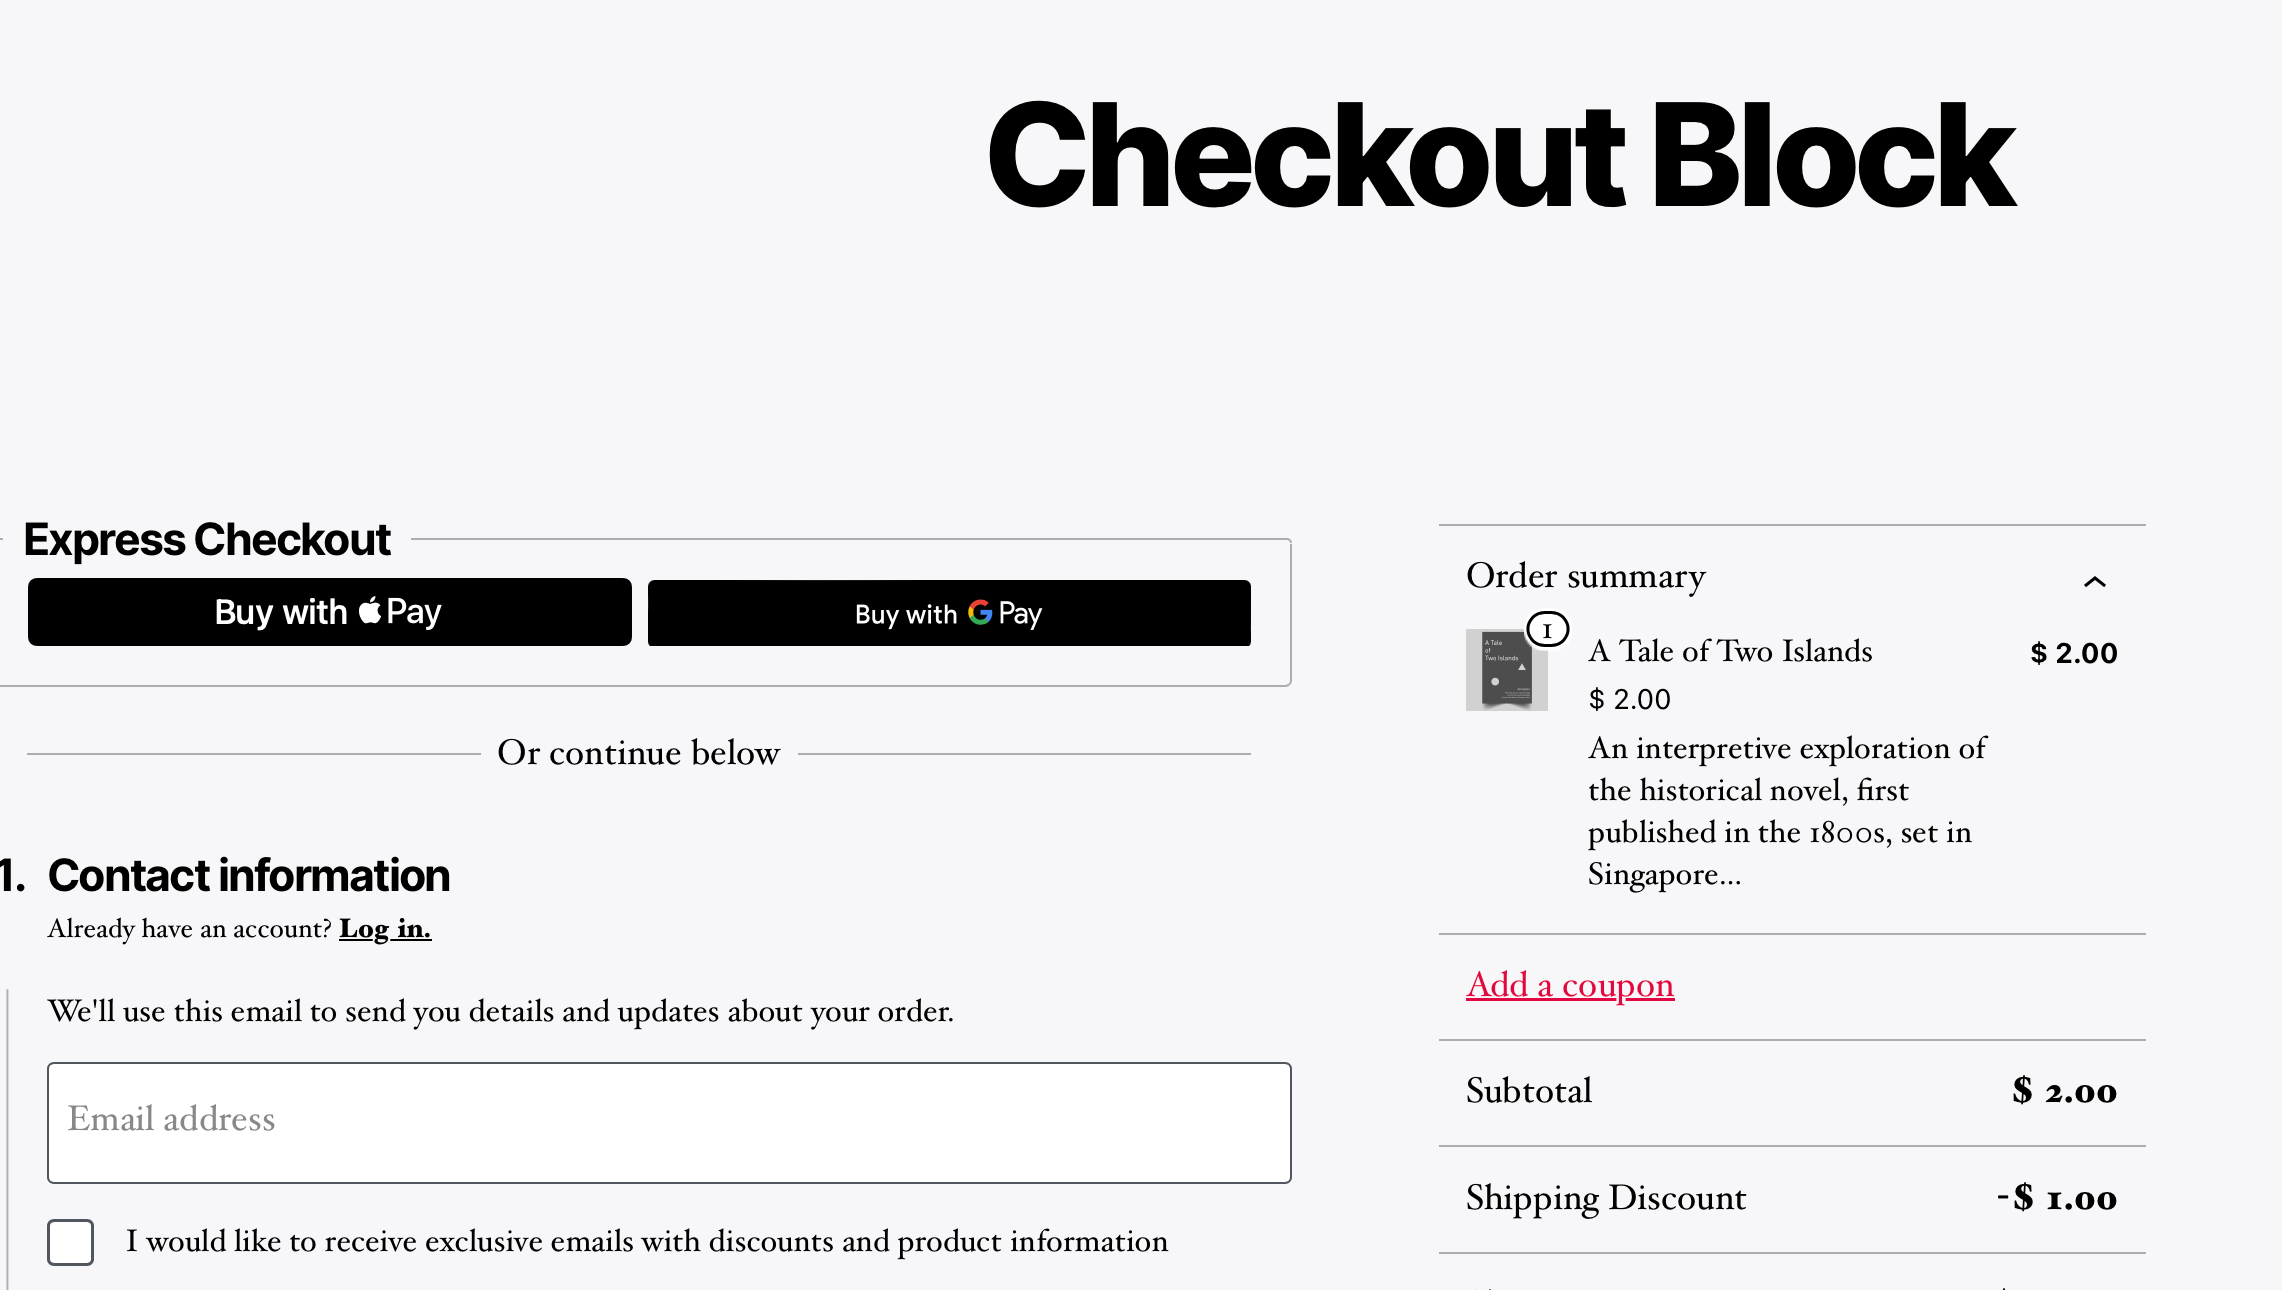
Payment Experience
The customer can tap or click the button to make a purchase with Apple Pay. After they do, the shipping and billing information that they added to their wallet appears, as well as the cost of the order, shipping rates, and taxes. The customer then has to authenticate the purchase. The authentication process is slightly different depending on the device the customer is using:
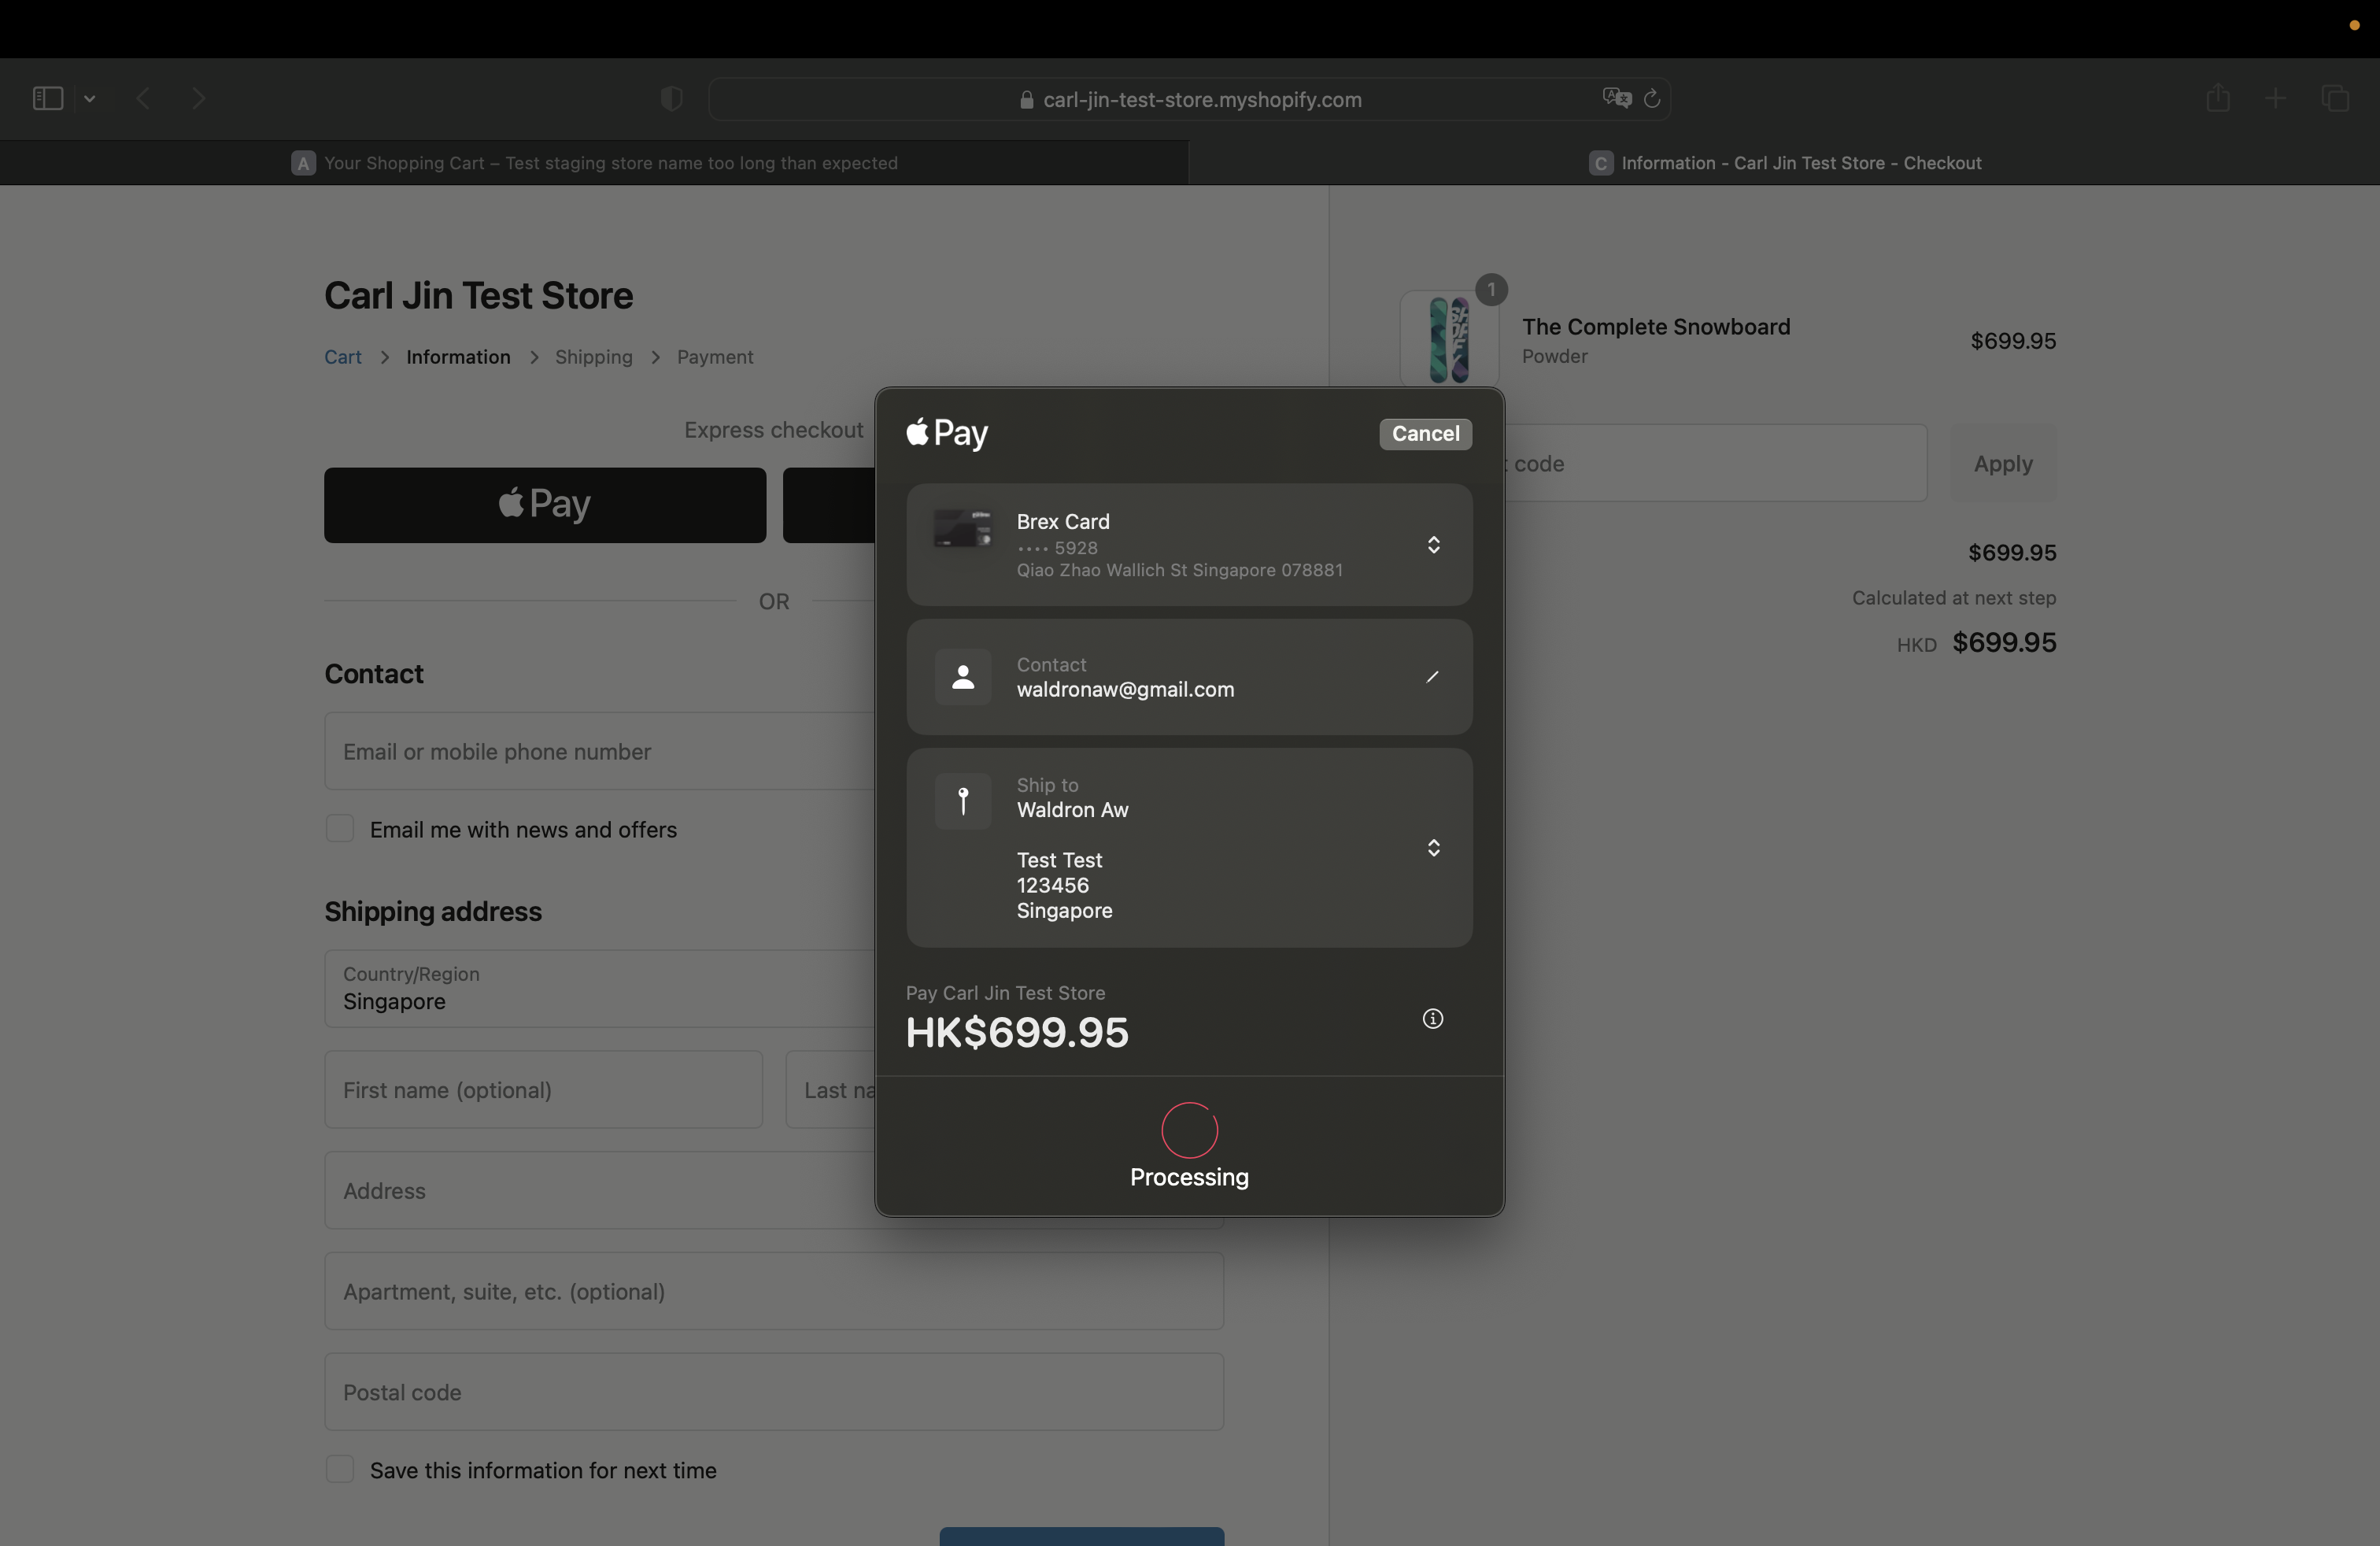
- On an iPhone or iPad.
A prompt appears on the device, telling them to confirm the purchase by using the Touch/Face ID on their device. The customer scans their fingerprint on the device's Touch ID to authenticate the purchase.
- On a MacBook with Touch ID.
A prompt appears on the customer's Touch Bar, telling them to confirm the purchase by using the Touch ID on their Macbook. The customer scans their fingerprint on the Touch ID to authenticate the purchase.
- On a Mac without Touch ID.
If the customer doesn't have Touch ID, then they can use Apple Pay on their Mac computer with another device, like an iPhone, iPad, or an Apple Watch. To verify connectivity, the customer must make sure the device and computer meet the following setup requirements:
- They are close to each other.
- Bluetooth is turned on.
- They are logged in to the same iCloud account.
- A dialog appears on the customer's computer, telling them to confirm the purchase by using the Touch ID on their other device. The customer scans their fingerprint on their device to authenticate the purchase.