Sample integration
This page provides a step-by-step integration guide for the fictitious platform VendorPayOS to streamline its global payout processes to vendors. The integration involves onboarding VendorPayOS's customers (depicted by ImportCo, and MarCo in the below diagram) as connected accounts in Airwallex, VendorPayOS pulling funds from the customers' external bank accounts into their connected account Wallets, and then transferring these funds to the external bank accounts of the vendors.
Before you begin
- You must have a pre-configured demo Airwallex platform account with API access. If you don't already have one, contact your Account Manager to get access.
- Obtain your access token API using your unique Client ID and API key. You must have your access token to make API calls.
- You should have demo account credentials (username and password) and a template ID for hosted onboarding to follow this integration guide.
Step 1: Onboard customers onto your platform
Airwallex offers multiple options to onboard connected accounts and submit them for KYC.
- Embedded KYC component (Airwallex-hosted iFrame)
- Hosted flow (Airwallex-hosted full-page redirect)
- Connected Accounts API

As an example, we will be using the Hosted flow (Airwallex-hosted full-page redirect) integration to onboard your customers.
For each of your customers, you will need to:
- Create a connected account.
- Request a URL to redirect your customer to an Airwallex hosted onboarding web form.
- Authorize the URL so your customer can access the onboarding form.
- Verify your customer has successfully onboarded.
Create a connected account
As a platform, you can create Airwallex connected accounts for your customers underneath your platform account. You can then transact on behalf of connected accounts such as debiting funds from the connected account's Wallet to pay out to external customers.
Example request
1curl -X POST https://api-demo.airwallex.com/api/v1/accounts/create \2 -H 'Content-Type: application/json' \3 -H 'Authorization: Bearer {{ACCESS_TOKEN}}' \4 -d '{5 "account_details": {6 "business_details": {7 "business_name": "ImportCo"8 }9 },10 "customer_agreements": {11 "agreed_to_data_usage": true,12 "agreed_to_terms_and_conditions": true13 },14 "primary_contact": {15 "email": "[email protected]"16 }17 }'
Example response
1{2 "account_details": {3 ...4 "legal_entity_id": "le_-jiUQPbdNSy9whwLKI7XQw",5 "legal_entity_type": "BUSINESS"6 },7 "created_at": "2024-03-26T21:51:28+0000",8 "customer_agreements": {9 "agreed_to_data_usage": true,10 "agreed_to_terms_and_conditions": true,11 "opt_in_for_marketing": false12 },13 "id": "acct_0QnUH-VGOF6l70lKBZIQZQ",14 "nickname": "acct_0QnUH-VGOF6l70lKBZIQZQ",15 "primary_contact": {16 ...17 "email": "[email protected]",18 },19 "status": "CREATED",20 "view_type": "COMPLETE"21}
Create a hosted onboarding web form
Once a connected account is created, you will need to onboard your customer through a KYC process to finish activating their account. Airwallex provides multiple options to onboard your customer. The simplest option is to redirect your customer to an online onboarding form that is hosted by Airwallex. The customer submits their documentation, and Airwallex will handle the verification process, any requests for additional information, as well as the approval or rejection of the request.
You can start the hosted onboarding process by requesting a hosted flow instance for the connected account. You will need your hosted onboarding template id (template) and the connected account id (account_id). You will also need to specify a return_url to which the customer will be redirected once the onboarding is complete.
A successful request returns an onboarding URL (url) and a hosted flow instance ID (id). The onboarding URL must not be shared with the customer until it's authorized by you to ensure that it's only intended for this customer.
Example request
1curl -X POST https://api-demo.airwallex.com/api/v1/hosted_flows/create \2 -H 'Content-Type: application/json' \3 -H 'Authorization: Bearer {{ACCESS_TOKEN}}' \4 -d '{5 "account_id": "acct_0QnUH-VGOF6l70lKBZIQZQ",6 "template": "acct_KuU3_cYnORGzwRXt4I-J8A_kyc",7 "return_url": "https://importco.com/redirect_url"8 }'
Example response
1{2 "id": "ahfi_IriUYRv-TuWIHnst2Dj4pw",3 "metadata": {},4 "result": {},5 "status": "INIT",6 "url": "https://demo.airwallex.com/app1/hostedflow?ahfi_id=ahfi_IriUYRv-TuWIHnst2Dj4pw&return_url=https%253A%252F%252Fimportco.com%252Fredirect_url"7}
Authorize the hosted onboarding web form URL
Authorize the URL using the hosted flow id returned in the previous request. The authorized URL is short-lived so it's highly recommended that you redirect the customer as quickly as possible.
Example request
1curl -X POST https://api-demo.airwallex.com/api/v1/hosted_flows/ahfi_IriUYRv-TuWIHnst2Dj4pw/authorize \2 -H 'Content-Type: application/json' \3 -H 'Authorization: Bearer {{ACCESS_TOKEN}}' \4 -d '{}'
Example response
1{2 "authorization_code": "gE8Sbu_b4VKEpxElifRibY1uymBFyJdbYMhBbTLeYN0H",3 "id": "ahfi_IriUYRv-TuWIHnst2Dj4pw",4 "metadata": {},5 "result": {},6 "status": "INIT",7 "url": "https://demo.airwallex.com/widgets/hostedflows/auth?ahfi_id=ahfi_IriUYRv-TuWIHnst2Dj4pw&authorization_code=gE8Sbu_b4VKEpxElifRibY1uymBFyJdbYMhBbTLeYN0H&return_url=https%253A%252F%252Fimportco.com%252Fredirect_url"8}
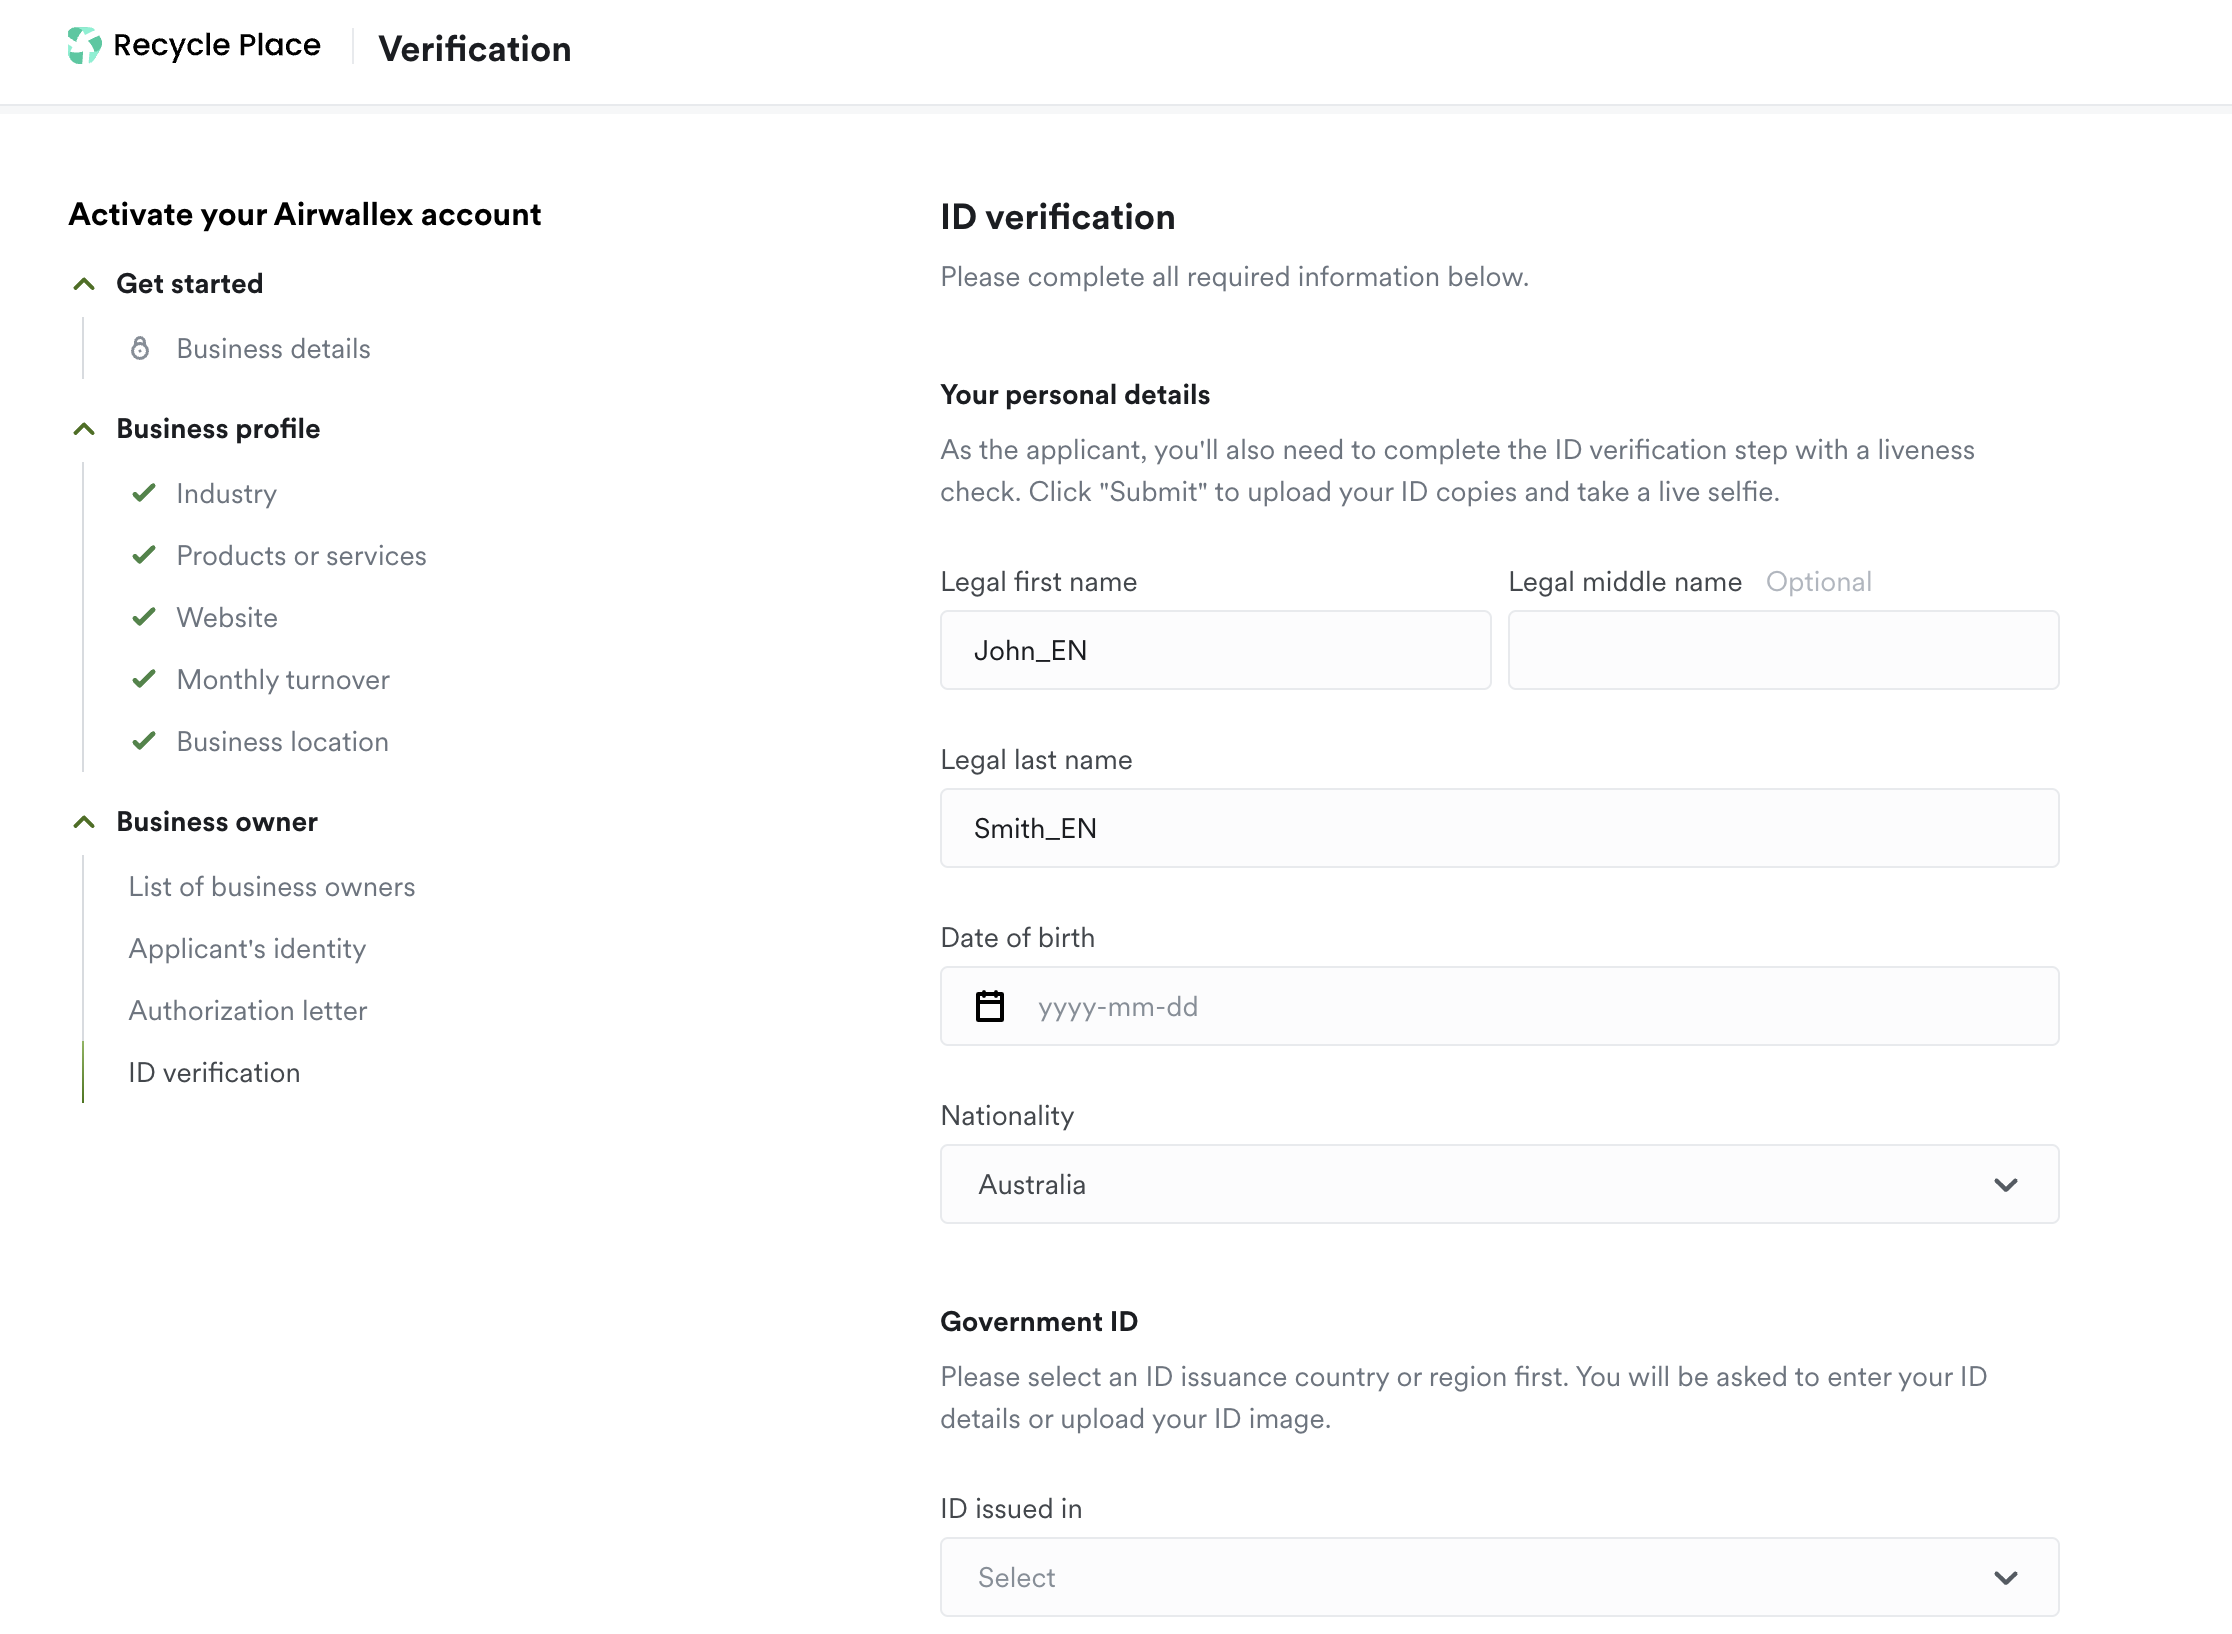
Note that KYC requirements differ between countries and other regulations. Here's a sample onboarding form for illustration purposes.
Verify successful customer onboarding
After your customer finishes onboarding, the status of the connected account will transition to SUBMITTED. Confirm the account status by calling Retrieve a Connected Account API.
Example response
1{2 "account_details": {3 "business_details": {4 ...5 },6 "business_person_details": [],7 },8 "created_at": "2024-03-26T22:57:25+0000",9 "customer_agreements": {10 "agreed_to_data_usage": true,11..12 },13 "id": "acct_EhiE6vo_P0S8XY_0bPg8wg",14 "primary_contact": {15 "attachments": {16 "identity_files": []17 },18 "email": "[email protected]",19 "mobile": "string"20 },21 "status": "SUBMITTED"22}
For a smoother onboarding experience, use account status webhooks to respond to customer account validation in real-time and seamlessly integrate them into your system. By relying on these webhooks, you can eliminate the need for polling and automatically initiate customer onboarding upon validation.
As you build your integration, you might want to conduct unit and end-to-end testing of your integration. In the demo environment, you can simulate the KYC process and programmatically transition the account status from SUBMITTED to ACTIVE using the connected account simulation API. Simulation APIs are not available in the production environment.
The sample code below shows how to simulate the status transition for the connected account to ACTIVE.
Example request
1curl -X POST https://api-demo.airwallex.com/api/v1/simulation/accounts/acct_t5blDphNM1ODAZjkGYmlpA/update_status \2 -H 'Content-Type: application/json' \3 -H 'Authorization: Bearer {{ACCESS_TOKEN}}' \4 -d '{5 "next_status": "ACTIVE"6 }'
Example response
1{2 "id": "acct_t5blDphNM1ODAZjkGYmlpA",3 ...,4 "status": "ACTIVE"5}
At this point, your connected account is activated.
See also
- Understanding the difference between Platform Account vs. Connected Account.
- For more information on the hosted flow solution, see Hosted onboarding.
- To explore the other KYC onboarding options, see KYC and onboarding.
Handle KYC Request for Information (RFI)
In some cases, Airwallex may request additional information from your customers if the information initially provided during KYC is deemed insufficient to approve the application. To handle any requests for information (RFI), we recommend integrating our hosted KYC RFI solution, which has a similar integration setup as hosted onboarding.
Step 2: Fund the customer's Wallet
While you can choose from multiple options to fund the Wallet, ImportCo wants to add a US bank account (Linked Account) and pull funds using ACH direct debit. VendorPayOS can complete a one-time linkage of ImportCo's external bank account to their connected account with Airwallex. This allows funds to be pulled in over direct debit, avoiding the need for ImportCo to ‘push' funds from their bank account to Airwallex. Please note that applicable limits are in place to mitigate the risk of direct debit recalls.
A Linked Account is a verified external financial account (such as a bank account, credit/debit card, or e-wallet account) that is bound to an Airwallex account. In this sample integration, we will create a Linked Account for ImportCo's US bank account.
Before you can create a Linked Account and add funds via direct debit, you must obtain a direct debit agreement from the external bank account owners. In the demo environment, we can bypass this mandate. For production, see Direct Debit mandate requirements.
Create a Linked Account using micro-deposits verification
As a platform, you can call Linked Accounts API endpoints on behalf of your connected accounts by specifying the connected account's open ID (in the format acct_xxxxxxxx) in the x-on-behalf-of header of your API requests.
Note that currently Airwallex only supports linking bank accounts owned by the business that signed up for the Airwallex account, or by one of its Ultimate Beneficial Owners (UBOs).
Example request
1curl -X POST https://api-demo.airwallex.com/api/v1/linked_accounts/create \2 -H 'x-on-behalf-of: acct__iX6ylHGPfuTdQa-HNLY7A' \3 -H 'Content-Type: application/json' \4 -H 'Authorization: Bearer {{ACCESS_TOKEN}}' \5 -d '{6 "preferred_verification_type": "MICRO_DEPOSIT",7 "request_id": "test_unique_id_1",8 "truelayer": {9 "code": "B2D8A5F9896AAA08E34DF3099649A1C249D562996D1416BCE76F66C372E56797",10 "state": 678147215582823811 },12 "type": "US_BANK",13 "mandate": {14 "email": "[email protected]",15 "preferred_reference": "AWX",16 "signatory": "Tester Smith",17 "type": "US_ACH_DEBIT",18 "version": "1.0"19 },20 "us_bank": {21 "account_name": "ImportCo",22 "account_number": "89098199202",23 "ach": "084106768",24 "currency": "USD",25 "entity_type": "BUSINESS"26 }27 }'
Example response
1{2 "capabilities": {3 "balance_check": false,4 "direct_debit_deposit": false5 },6 "id": "45974547-fb9d-4b8a-b5ad-dfee832e259e",7 "next_action": {8 "micro_deposit_count": 2,9 "remaining_attempts": 3,10 "type": "verify_micro_deposits"11 },12 "status": "REQUIRES_ACTION",13 "supported_currencies": [14 "USD"15 ],16 "us_bank": {17 "account_name": "ImportCo",18 "account_number": "89098199202",19 "ach": "084106768",20 "currency": "USD",21 "entity_type": "BUSINESS"22 },23 "type": "US_BANK"24}
To successfully link an external bank account, Airwallex must first verify its ownership. Airwallex offers two options to verify the external bank account: Micro-deposits or Open Banking.
In this sample integration, we'll use the micro-deposits verification to verify that the Linked Account and mandate have been successfully created.
Example request
1curl -X POST https://api-demo.airwallex.com/api/v1/linked_accounts/45974547-fb9d-4b8a-b5ad-dfee832e259e/verify_microdeposits \2 -H 'x-on-behalf-of: acct__iX6ylHGPfuTdQa-HNLY7A' \3 -H 'Content-Type: application/json' \4 -H 'Authorization: Bearer {{ACCESS_TOKEN}}' \5 -d '{6 "amounts": [7 0.01,8 0.029 ]10 }'
Example response
1{2 "capabilities": {3 "balance_check": false,4 "direct_debit_deposit": false5 },6 "id": "45974547-fb9d-4b8a-b5ad-dfee832e259e",7 "status": "SUCCEEDED",8 "supported_currencies": [9 "USD"10 ],11 "us_bank": {12 "account_name": "ImportCo_4",13 "account_number": "89098199204",14 "ach": "084106768",15 "currency": "USD",16 "entity_type": "BUSINESS"17 },18 "type": "US_BANK"19}
After verification, you will see that the Linked Account status has transitioned to SUCCEEDED. Review status codes to track status transitions when Linked Accounts are created and verified.
Similar to the account status webhook, you can listen to Linked Account webhook events to notify your system that the Linked Account verification is successful.
You can retrieve details of your Linked Account by calling Retrieve a Linked Account API.
Example response
1{2 "capabilities": {3 "balance_check": false,4 "direct_debit_deposit": false5 },6 "id": "45974547-fb9d-4b8a-b5ad-dfee832e259e",7 "status": "SUCCEEDED",8 "supported_currencies": [9 "USD"10 ],11 "us_bank": {12 "account_name": "ImportCo_4",13 "account_number": "89098199204",14 "ach": "084106768",15 "currency": "USD",16 "entity_type": "BUSINESS"17 },18 "type": "US_BANK"19}
Fund ImportCo's Wallet via Direct Debit
After successfully linking ImportCo's Linked Account to its connected account with Airwallex, you can proceed to pull funds from the Linked Account into ImportCo's connected account Wallet using the steps outlined below.
Before you proceed, check funding limits for your platform using Get funding limits API. Platform funding limits determine the maximum amount of direct debit deposits that may be created, and are shared across all Airwallex accounts under your platform account. For more information, see direct debit flight times and funding limits. Contact your Account Manager to increase either the direct debit limit or the Faster Direct Debit limit, and understand our fee schedule for the Faster Direct Debit product.
Example response
1{2 "has_more": false,3 "items": [4 {5 "available": 10000.0,6 "currency": "USD",7 "limit": 10000.0,8 "status": "ACTIVE",9 "type": "DIRECT_DEBIT_DEPOSIT",10 "updated_at": "2024-04-01T23:20:57.982127Z"11 },12 {13 "available": 0,14 "currency": "USD",15 "limit": 0,16 "status": "ACTIVE",17 "type": "FASTER_DIRECT_DEBIT_DEPOSIT"18 }19 ],20 "total_count": 221}
Call Create a deposit via Direct Debit API to add funds into ImportCo's Wallet by providing ImportCo's Linked Account ID.
Example request
1curl -X POST https://api-demo.airwallex.com/api/v1/deposits/create \2 -H 'x-on-behalf-of: acct__iX6ylHGPfuTdQa-HNLY7A' \3 -H 'Content-Type: application/json' \4 -H 'Authorization: Bearer {{ACCESS_TOKEN}}' \5 -d '{6 "amount": 120.05,7 "currency": "USD",8 "deposit_type": "DIRECT_DEBIT",9 "funding_source_id": "45974547-fb9d-4b8a-b5ad-dfee832e259e",10 "reference": "test ref_1",11 "request_id": "c559d7fe-d911-4f3d-a937-7c24ba4b732a"12 }'
Example response
1{2 "amount": 120.05,3 "created_at": "2024-04-02T19:12:59+0000",4 "currency": "USD",5 "deposit_id": "1351a278-6a50-4614-8f7a-0e9685662f62",6 "payer_name": "ImportCo_4",7 "source": {8 "funding_source_id": "45974547-fb9d-4b8a-b5ad-dfee832e259e",9 "type": "US_ACH_DEBIT"10 },11 "statement_ref": "test ref_1",12 "status": "PENDING",13 "type": "DIRECT_DEBIT"14}
Make sure the amount you deposit does not exceed the funding limit.
You can also listen to the deposit.settled webhook to confirm that the deposit is successfully settled into the connected account's Wallet.
See also
- For detailed instructions on depositing funds into Wallets via direct debits from Linked Accounts, see Add funds via direct debit from Linked Accounts.
- Learn more about Direct Debit funding limits.
- Explore Linked Account using Open Banking verification.
Step 3: Process payouts
VendorPayoutOS can enable customers to trigger vendor payouts on a one time or recurring basis. In this integration guide, we will demonstrate the flow of a one-time payment where funds will move from each of customers' connected accounts to the external bank accounts of the vendors who are receiving the payout, over Airwallex's payout rails.
Airwallex offers multiple options to collect beneficiary bank account information:
- Native API: Programmatically create payouts with our Payout API endpoints with full control of the beneficiary bank account information collection experience.
- Using API and Form Schema: Programmatically retrieve beneficiary bank account information schema for payout scenarios and render on your user interface.
- Embedded Components: Low-code option to render your beneficiary bank account information collection experience using pre-built UI elements.
Prepare required beneficiary information
Before creating a transfer, you will need to prepare the required beneficiary information, which can vary depending on the payout country/currency, transfer method, local clearing system, beneficiary type.
Retrieve the form schema
In this sample integration, we will use Get the form schema API endpoint to programmatically obtain the required beneficiary fields for a given country, currency, transfer method, clearing system and entity type. The response also includes validation rules and recommended UI components in JSON format for each field to be rendered on the form.
Example request
1curl -X POST https://api-demo.airwallex.com/api/v1/beneficiary_form_schemas/generate \2 -H 'x-on-behalf-of: acct__iX6ylHGPfuTdQa-HNLY7A' \3 -H 'Content-Type: application/json' \4 -H 'Authorization: Bearer {{ACCESS_TOKEN}}' \5 -d '{6 "account_currency": "USD",7 "bank_country_code": "US",8 "entity_type": "COMPANY",9 "local_clearing_system": "ACH",10 "transfer_method": "LOCAL"11 }'
Example response
1{2 "condition": {3 "account_currency": "USD",4 "bank_country_code": "US",5 "entity_type": "COMPANY",6 "local_clearing_system": "ACH",7 "transfer_method": "LOCAL"8 },9 "fields": [10 {11 "enabled": true,12 "field": {13 "key": "entity_type",14 "options": [15 {16 "label": "Business",17 "value": "COMPANY"18 },19 {20 "label": "Personal",21 "value": "PERSONAL"22 }23 ],24 "default": "PERSONAL",25 "description": "",26 "example": "PERSONAL",27 "label": "Recipient account type",28 "placeholder": "",29 "refresh": true,30 "tip": "",31 "type": "RADIO"32 },33 "path": "beneficiary.entity_type",34 "required": true,35 "rule": {36 "type": "string",37 "pattern": "COMPANY|PERSONAL"38 }39 }40 ],41 ...42 "key": "newRecipient"43}
Validate a beneficiary
Call Validate a beneficiary API to check for errors before creating a beneficiary:
- If validation errors are found, a list of all errors will be returned as a 400 response.
- If all parameters provided for the payout are valid, the endpoint will return a 200 (OK) response.
Example request
1curl -X POST https://api-demo.airwallex.com/api/v1/beneficiaries/validate \2 -H 'x-on-behalf-of: acct__iX6ylHGPfuTdQa-HNLY7A' \3 -H 'Content-Type: application/json' \4 -H 'Authorization: Bearer {{ACCESS_TOKEN}}' \5 -d '{6 "beneficiary": {7 "additional_info": {8 "personal_email": "[email protected]"9 },10 "address": {11 "city": "Seattle",12 "country_code": "US",13 "postcode": "98104",14 "state": "Washington",15 "street_address": "412 5th Avenue"16 },17 "bank_details": {18 "account_currency": "USD",19 "account_name": "John Walker",20 "account_number": "50001121",21 "account_routing_type1": "aba",22 "account_routing_value1": "021000021",23 "bank_country_code": "US",24 "local_clearing_system": "ACH"25 },26 "company_name": "Complete Concrete Pty Ltd",27 "entity_type": "COMPANY"28 },29 "nickname": "Complete Concrete Pty Ltd",30 "transfer_methods": [31 "LOCAL"32 ]33 }'
Example response
1"OK”
Create a beneficiary
Proceed to create a beneficiary using the validated beneficiary payload.
In the production environment, you will need to build a generic response handler to parse the validation rules and recommended UI component definitions in the response and adopt them in your application. However, as all schema and field validation rules are maintained by Airwallex, once integrated there will be no further code changes needed on your end when there are updates to the schema.
Example request
1curl -X POST https://api-demo.airwallex.com/api/v1/beneficiaries/create \2 -H 'x-on-behalf-of: acct__iX6ylHGPfuTdQa-HNLY7A' \3 -H 'Content-Type: application/json' \4 -H 'Authorization: Bearer {{ACCESS_TOKEN}}' \5 -d '{6 "beneficiary": {7 "additional_info": {8 "personal_email": "[email protected]"9 },10 "address": {11 "city": "Seattle",12 "country_code": "US",13 "postcode": "98104",14 "state": "Washington",15 "street_address": "412 5th Avenue"16 },17 "bank_details": {18 "account_currency": "USD",19 "account_name": "John Walker",20 "account_number": "50001121",21 "account_routing_type1": "aba",22 "account_routing_value1": "021000021",23 "bank_country_code": "US",24 "local_clearing_system": "ACH"25 },26 "company_name": "Complete Concrete Pty Ltd",27 "entity_type": "COMPANY"28 },29 "nickname": "Complete Concrete Pty Ltd",30 "transfer_methods": [31 "LOCAL"32 ]33 }'
Example response
1{2 "beneficiary": {3 "additional_info": {4 "personal_email": "[email protected]"5 },6 "address": {7 "city": "Seattle",8 "country_code": "US",9 "postcode": "98104",10 "state": "Washington",11 "street_address": "412 5th Avenue"12 },13 "bank_details": {14 "account_currency": "USD",15 "account_name": "John Walker",16 "account_number": "50001121",17 "account_routing_type1": "aba",18 "account_routing_value1": "021000021",19 "bank_country_code": "US",20 "bank_name": "JPMORGAN CHASE BANK, N.A.",21 "local_clearing_system": "ACH"22 },23 "entity_type": "COMPANY"24 },25 "id": "eb5e186c-2c15-4dd8-b422-43b2e7f31265",26 "nickname": "Complete Concrete Pty Ltd",27 "payer_entity_type": "COMPANY",28 "transfer_methods": [29 "LOCAL"30 ]31}
Create a payout transfer
Call Create a new transfer API with the required beneficiary and transaction information (currency, amount, date, reference) to create a transfer.
If the source currency is different from the transfer currency, an underlying currency conversion will be booked. By default, the prevailing market rate at the point of conversion will be applied to the underlying currency conversion.
Example request
1curl -X POST https://api-demo.airwallex.com/api/v1/transfers/create \2 -H 'x-on-behalf-of: acct__iX6ylHGPfuTdQa-HNLY7A' \3 -H 'Content-Type: application/json' \4 -H 'Authorization: Bearer {{ACCESS_TOKEN}}' \5 -d '{6 "beneficiary_id": "eb5e186c-2c15-4dd8-b422-43b2e7f31265",7 "transfer_amount": "1000",8 "transfer_currency": "USD",9 "transfer_method": "LOCAL",10 "reason": "travel",11 "reference": "TC04",12 "request_id": "3338cd45-3ef4-46ce-86d0-dbc1bbesss",13 "source_currency": "AUD",14 "fee_paid_by": "PAYER",15 "application_fee_options": [16 {17 "source_type": "TRANSFER",18 "type": "FIXED",19 "amount": "3",20 "currency": "HKD"21 },22 {23 "source_type": "TRANSFER",24 "type": "PERCENTAGE",25 "percentage": "0.5"26 },27 {28 "source_type": "CONVERSION",29 "type": "PERCENTAGE",30 "percentage": "0.5",31 "currency": "AUD"32 }33 ]34 }'
Example response
1{2 "amount_beneficiary_receives": 1000,3 "amount_payer_pays": 1546.63,4 "application_fee_options": [5 {6 "amount": "3",7 "currency": "HKD",8 "source_type": "TRANSFER",9 "type": "FIXED"10 },11 {12 "percentage": "0.5",13 "source_type": "TRANSFER",14 "type": "PERCENTAGE"15 },16 {17 "currency": "AUD",18 "percentage": "0.5",19 "source_type": "CONVERSION",20 "type": "PERCENTAGE"21 }22 ],23 "application_fees": [24 {25 "amount": "3",26 "currency": "HKD",27 "source_type": "TRANSFER"28 },29 {30 "amount": "7.67",31 "currency": "AUD",32 "source_type": "TRANSFER"33 },34 {35 "amount": "7.69",36 "currency": "AUD",37 "source_type": "CONVERSION"38 }39 ],40 "beneficiary": {...},41 "conversion_id": "eb0ddfef-46e5-4eb4-958c-43177135d815",42 "created_at": "2024-11-01T00:17:57+0000",43 "fee_amount": 12.86,44 "fee_currency": "AUD",45 "fee_paid_by": "PAYER",46 "funding": {47 "status": "FUNDED"48 },49 "id": "dd323893-e6d4-462c-9edc-5ff88f74c259",50 "payer": {...},51 "reason": "travel",52 "reference": "TC04",53 "remarks": "",54 "request_id": "3338cd45-3ef4-46ce-86d0-dbc1bbe39312",55 "short_reference_id": "P241101-Q727GIH",56 "source_amount": 1533.77,57 "source_currency": "AUD",58 "status": "SCHEDULED",59 "swift_charge_option": "SHARED",60 "transfer_amount": 1000,61 "transfer_currency": "USD",62 "transfer_date": "2024-10-31",63 "transfer_method": "LOCAL",64 "updated_at": "2024-11-01T00:17:59+0000"65}
Retrieve a payout
Call Retrieve a transfer API to get the status of the transfer.
The transfer status should transition from SCHEDULED to PROCESSING. Listen to the payout.transfer.funding.funded webhook to confirm that the transfer has been successfully processed.
For detailed information on creating and validating a transfer, see create a transfer and validate a transfer.
Example response
1{2 "amount_beneficiary_receives": 1000.0,3 "amount_payer_pays": 1546.63,4 "application_fee_options": [5 {6 "amount": "3",7 "currency": "HKD",8 "source_type": "TRANSFER",9 "type": "FIXED"10 },11 {12 "percentage": "0.5",13 "source_type": "TRANSFER",14 "type": "PERCENTAGE"15 },16 {17 "currency": "AUD",18 "percentage": "0.5",19 "source_type": "CONVERSION",20 "type": "PERCENTAGE"21 }22 ],23 "application_fees": [24 {25 "amount": "3",26 "currency": "HKD",27 "source_type": "TRANSFER"28 },29 {30 "amount": "7.67",31 "currency": "AUD",32 "source_type": "TRANSFER"33 },34 {35 "amount": "7.69",36 "currency": "AUD",37 "source_type": "CONVERSION"38 }39 ],40 "beneficiary": {41 "additional_info": {42 "personal_email": "[email protected]"43 },44 "address": {45 "city": "Seattle",46 "country_code": "US",47 "postcode": "98104",48 "state": "Alaska",49 "street_address": "412 5th Avenue"50 },51 "bank_details": {52 "account_currency": "USD",53 "account_name": "John Walker",54 "account_number": "50001121",55 "account_routing_type1": "aba",56 "account_routing_value1": "021000021",57 "bank_country_code": "US",58 "bank_name": "JPMORGAN CHASE BANK, N.A.",59 "iban": "123123123",60 "local_clearing_system": "ACH"61 },62 "entity_type": "COMPANY"63 },64 "conversion_id": "eb0ddfef-46e5-4eb4-958c-43177135d815",65 "created_at": "2024-11-01T00:17:57+0000",66 "fee_amount": 12.86,67 "fee_currency": "AUD",68 "fee_paid_by": "PAYER",69 "funding": {70 "status": "FUNDED"71 },72 "id": "dd323893-e6d4-462c-9edc-5ff88f74c259",73 "payer": {74 "additional_info": {75 "business_incorporation_date": "2023-05-17",76 "business_registration_number": "US-548-44-1793",77 "business_registration_type": "OTHERS"78 },79 "address": {80 "city": "New York",81 "country_code": "US",82 "postcode": "10082",83 "state": "NY",84 "street_address": "112 Highstreet, "85 },86 "company_name": "Chloe Demo Inc.",87 "entity_type": "COMPANY"88 },89 "reason": "travel",90 "reference": "TC04",91 "remarks": "",92 "request_id": "3338cd45-3ef4-46ce-86d0-dbc1bbe39312",93 "short_reference_id": "P241101-Q727GIH",94 "source_amount": 1533.77,95 "source_currency": "AUD",96 "status": "PROCESSING",97 "swift_charge_option": "SHARED",98 "transfer_amount": 1000.0,99 "transfer_currency": "USD",100 "transfer_date": "2024-10-31",101 "transfer_method": "LOCAL",102 "updated_at": "2024-11-01T00:18:02+0000"103}
See also
Fees and pricing
When a payout involves currency conversion (FX), there are two types of fees applied to the connected account:
- FX fees: These cover the cost of converting the payout amount from one currency to another.
- Payout fees: These are separate fees associated with sending the payout itself.
Airwallex allows you to mark up both FX and payout fees. This markup becomes your platform's revenue when your customers make transactions.
Your Account Manager can help you decide how to configure these fees. Options include:
- You can have Airwallex charge the connected accounts directly for FX and payout fees.
- You can cover the FX and payout fees yourself and create a customized pricing model for your product, such as a flat monthly subscription fee via your system.
Reporting and reconciliation
Call Get balance history API and Get list of financial transactions API anytime to retrieve balances and generate financial statements/reports for the purposes of reconciliation, proof of funds, and data analysis. For non-real-time data analysis and reporting requirements, you can also use Platform Reports API to get the data asynchronously in a file format and ingest into your data source.
Test and go live
After integrating with Airwallex's Connected Accounts, Treasury, Payouts products, you can simulate connected account status transition, deposits, payouts, and also test webhooks in the sandbox environment before going live in the production environment. For more information, see Integration checklist.
Make sure you handle failed transfers before you go live.
Troubleshooting
- Direct debit deposit error codes
- Transfer error codes
- Charges and connected account transfers error codes
Next steps
- Contact your Account Manager if you want to learn more about customizing your hosted flow landing page for business name, logo and color.
- Explore Quotes API if you would like to fix the conversion rate of the payout.